Documentation Index
1. Theme Installation
2. OptionTree Options
3. Menus
4. Portfolio
5. Shortcodes
6. Recommended plugins
1. Theme Installation
This can be done two different ways. This assumes you already have WordPress Installed on your server. We recommend using option #1 if you are new to WordPress.
- Option 1) From the Wordpress dashboard go to appearance>themes>install themes. Hit the upload link near the top of the screen. Then browse to the echo-folo.zip theme zip located in the folder "The Zip Files" withen your main download zip file. Hit upload now. Make sure to activate the theme once that is complete.
- Option 2) Use a FTP program to transfer the files from the folder "the theme files" in to the floder on your server called "themes". FileZilla is a great free FTP program. Make sure to activate the theme once that is complete.

2. OptionTree Options
After the theme is installed it will prompt you to install OptionTree. If you missed the prompt you will have to search plugins for OptionTree download and activate.
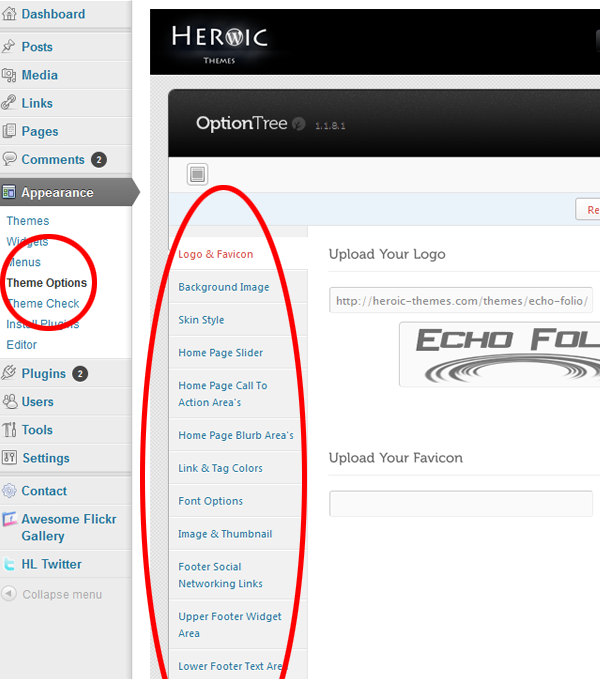
A lot of the theme will be managed from OptionTree. Once installed you can locate the menu from appearance>theme options.
For the most robust layout fill on as many options from OptionTree as you can.
Options you will find there are:
- Logo & Favicon
- Background Image
- Skin Style
- Home Page Slider
- Home Page Call To Action Area's
- Home Page Blurb Area's
- Link & Tag Colors
- Font Options
- Image & Thumbnail
- Social Networking Links
- Upper Footer Widget Area
- Lower Footer Text Area
- Lower Footer Social Links
- Top Of Site Subscribe & Info Area
3. Menu's
To control your menu's you will do this through appearance>menu's. You can set a different menu for responsive mode.
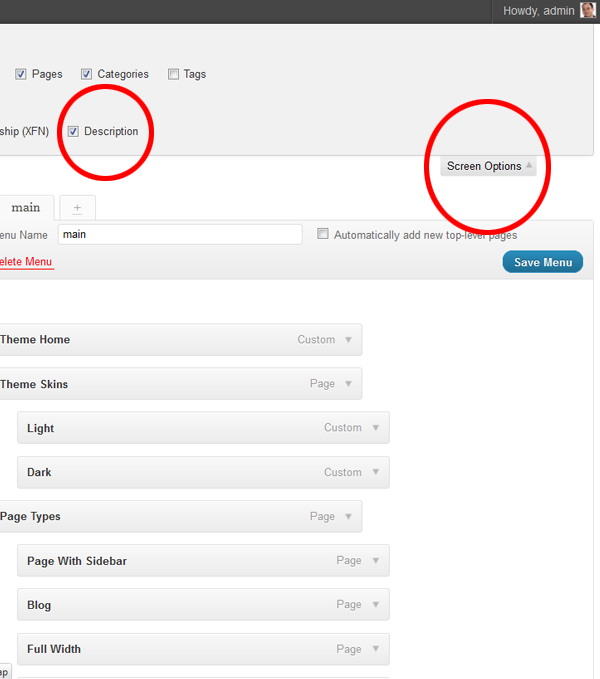
To get the sub menu text working you will have to click on screen options on the top right of your wordpress dashboard. Select description. This will give you an additional field to add the small text to your menu.
4. Portfolio
Adding portfolio items and pages is super easy. First create some portfolio items. Portfolio items are actually blog posts using the featured image. So create a post assign it to a category (important) and give it a featured image. Once this is complete create a new page and select from the menu on the right what kind of portfolio you want to use. At the bottom of the page you will specify what categories you want the portfolio to display. Publish the page. You should now have an awesome portfolio started.

5. Shortcodes
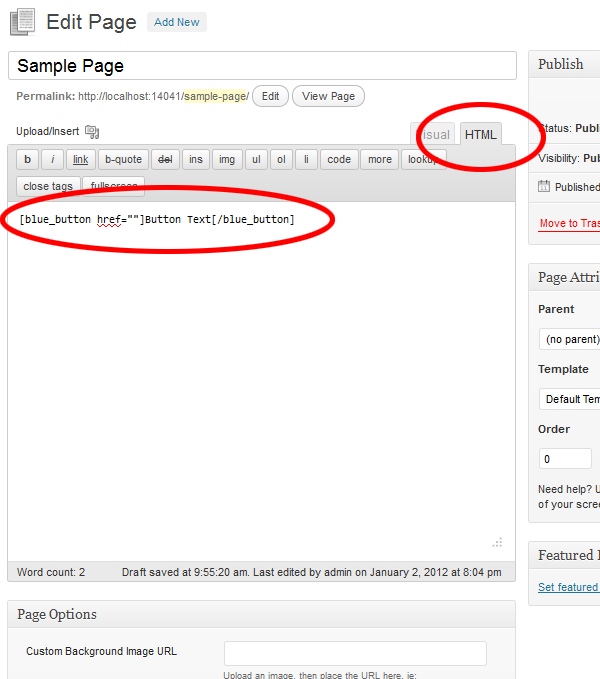
Shortcodes are a great way to add more funtionality to your site. You can add these anywhere in your site HTML is allowed including posts and pages.
Buttons
- [button href=""]Button Text[/button]
- [blue_button href=""]Button Text[/blue_button]
- [yellow_button href=""]Button Text[/yellow_button]
- [green_button href=""]Button Text[/green_button]
- [purple_button href=""]Button Text[/purple_button]
- [red_button href=""]Button Text[/red_button]
- [black_button href=""]Button Text[/black_button]
Aside Text
- [aside title="Aside Text"]This shortcode allows you to put some text to the side of some other text[/aside]
Call To Action
- [feature href="" buttontext="text"]Put a call to action anywhere[/feature]
Tag Line
- [supertagline]Tag Line Shortcode[/supertagline]
Quote
- [superquote]Quote Shortcode[/superquote]
Columns
- [one_column] Text [/one_column]
- [two_columns] Text [/two_columns]
- [three_columns] Text [/three_columns]
- [four_columns] Text [/four_columns]
- [five_columns] Text [/five_columns]
- [six_columns] Text [/six_columns]
- [seven_columns] Text [/seven_columns]
- [eight_columns] Text [/eight_columns]
- [nine_columns] Text [/nine_columns]
- [ten_columns] Text [/ten_columns]
- [eleven_columns] Text [/eleven_columns]
- [twelve_columns] Text [/twelve_columns]
- [thirteen_columns] Text [/thirteen_columns]
- [fourteen_columns] Text [/fourteen_columns]
- [fifteen_columns] Text [/fifteen_columns]
- [sixteen_columns] Text [/sixteen_columns]
- [onethird_columns] Text [/onethird_columns]
- [twothirds_columns] Text [/twothirds_columns]
6. Recommended Plugins
We used a couple really great plugins on the demo. So if your looking for the same result you should install and configure these.
- Dynamic To Top (Adds a button at the bottom of the page that will zip you to the top when clicked)
- HL Twitter (This is the twitter widget we used in our footer widget area)
- Awesome Flickr Gallery (We recommend this plugin because it has a ton of option for styling your twitter feed just the way you like)
- Contact Form 7 (This is perhaps one of the best plugins for creating a great contact form)